Real Images (Cambridge International IGCSE Physics)
Converging Lens - Real Image
Spec point —
3.2.3b· Draw and use ray diagrams for the formation of a real image by a converging lens
Constructing converging ray diagrams
- The three main rules for constructing ray diagrams are as follows:
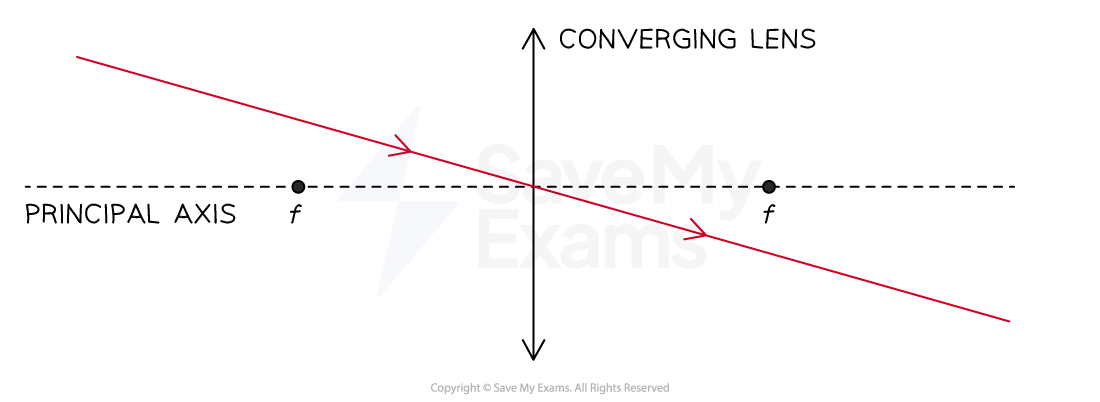
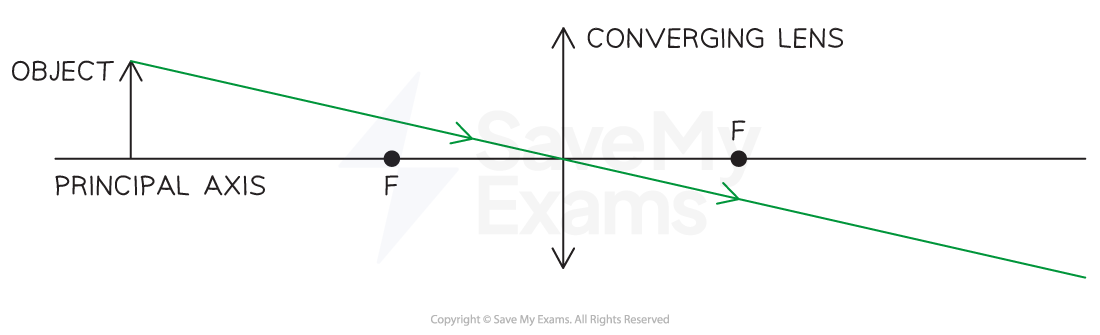
- Rays passing through the principal axis will pass through the optical centre of the lens undeviated
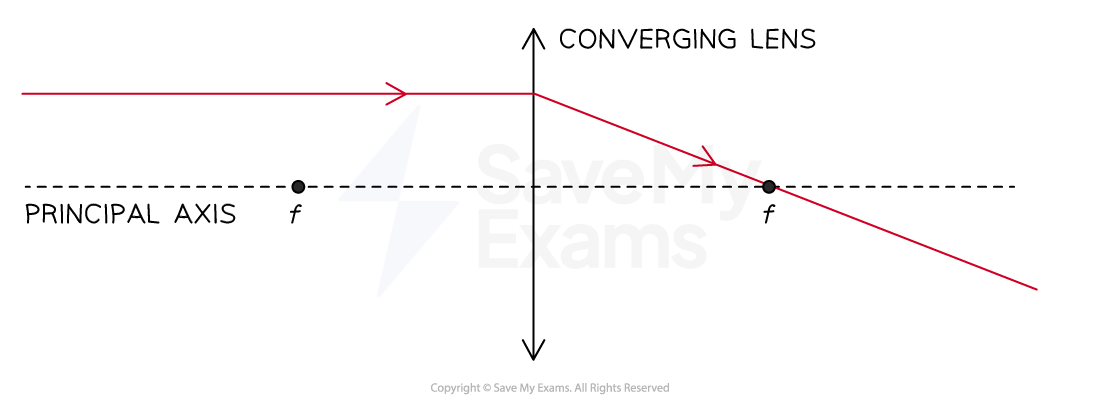
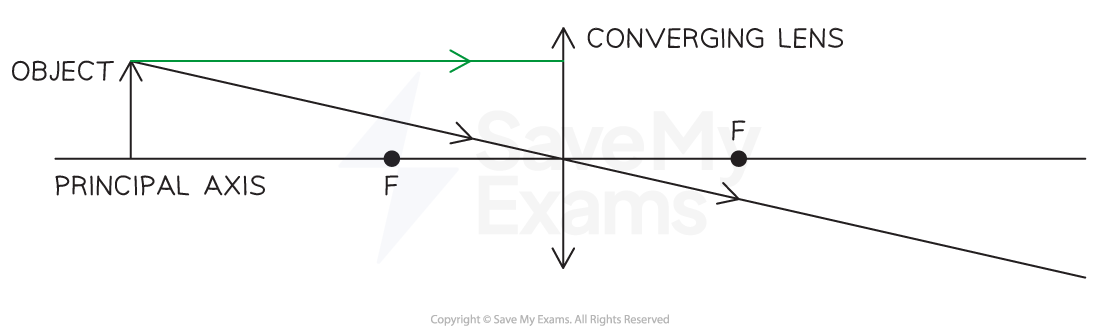
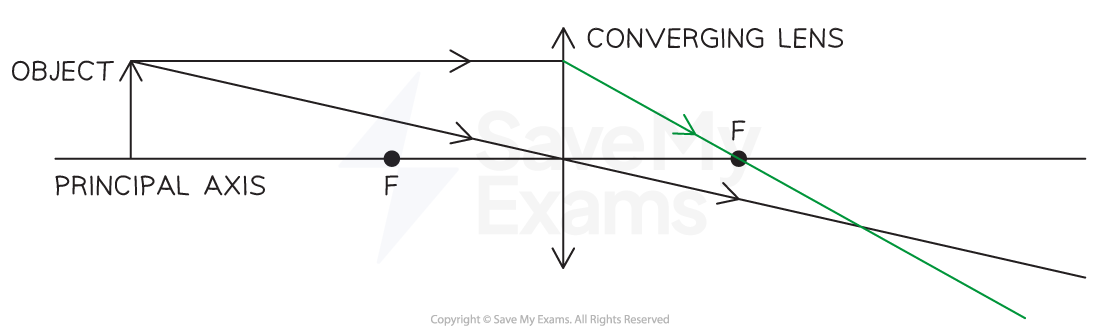
- Rays that are parallel to the principal axis will be refracted and pass through the focal point f
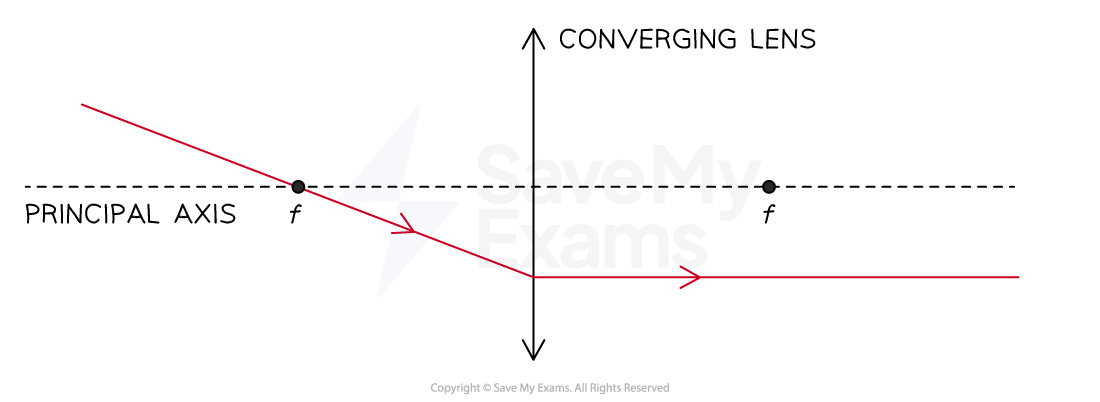
- Rays passing through the focal point f will emerge parallel to the principal axis
Drawing converging ray diagrams of real images
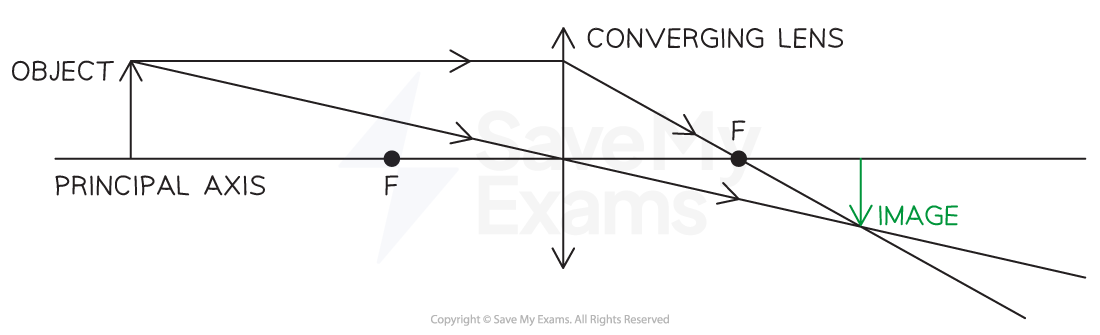
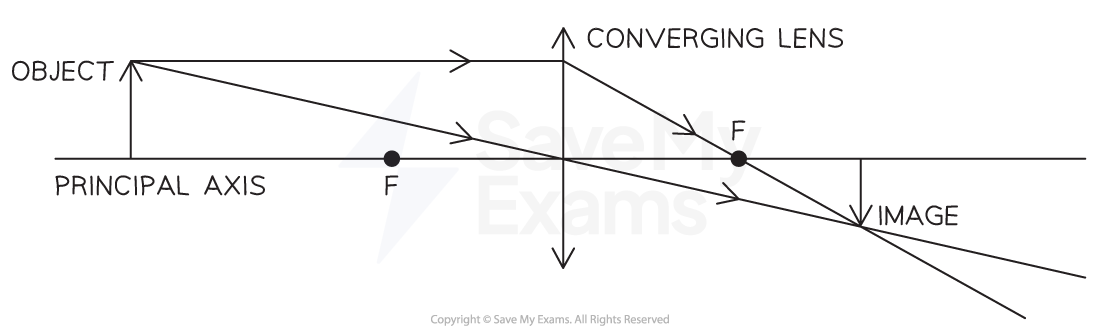
Object placed beyond 2f
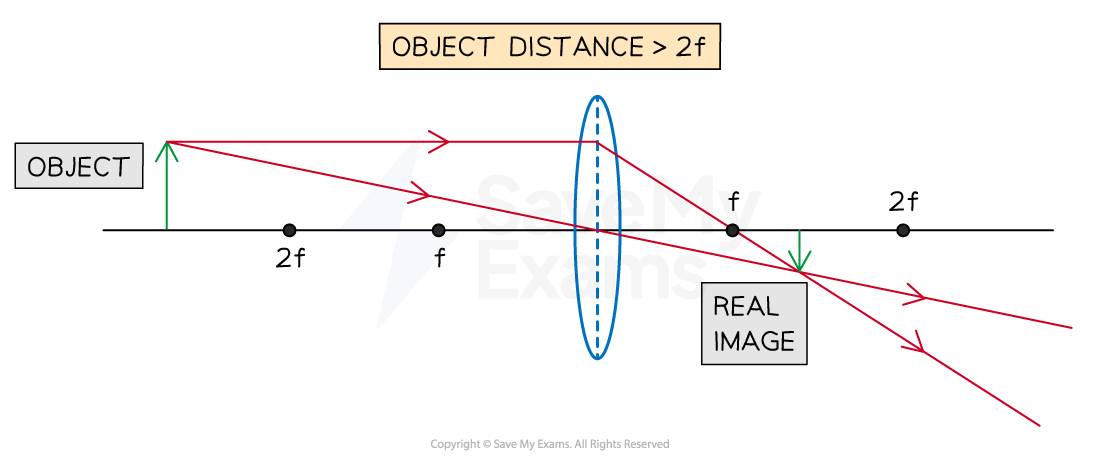
- When an object is placed beyond 2f (to the left of the lens), the image that forms (to the right of the lens) will have the following properties:
| The image forms... | between f and 2f |
|---|---|
| The nature of the image is... | real |
| The orientation of the image is... | inverted |
| The size of the image is... | diminished |
Object placed at 2f
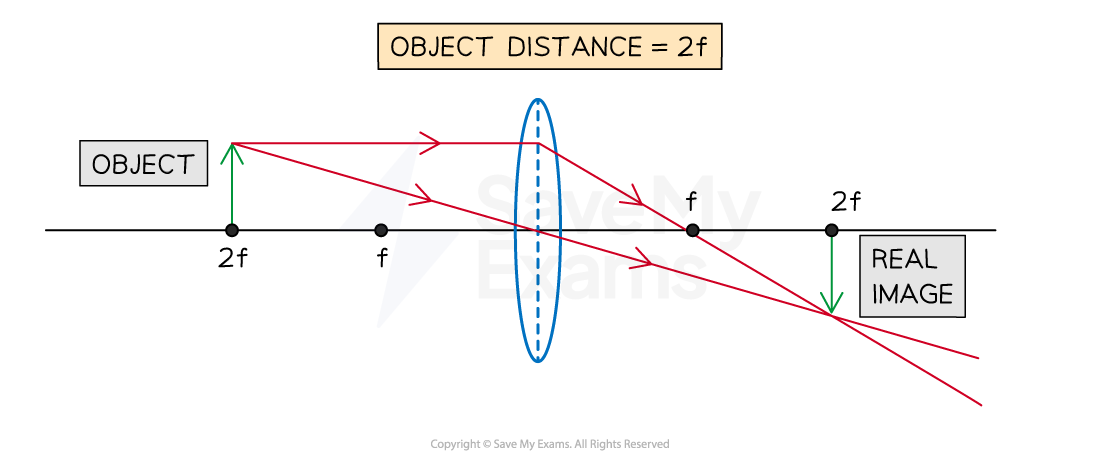
- When an object is placed at 2f (to the left of the lens), the image that forms (to the right of the lens) will have the following properties:
| The image forms... | at 2f |
|---|---|
| The nature of the image is... | real |
| The orientation of the image is... | inverted |
| The size of the image is... | the same |
Object placed between f and 2f
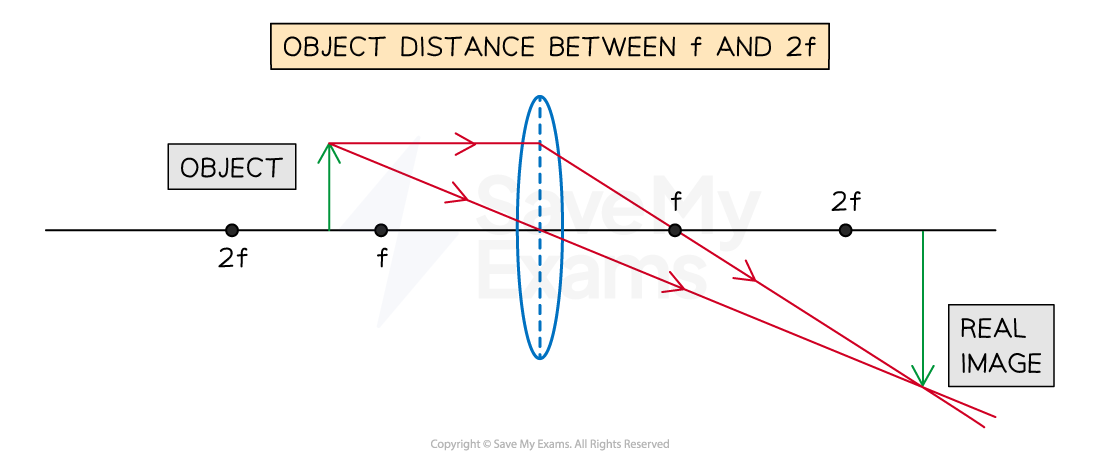
- When an object is placed between f and 2f (to the left of the lens), the image that forms (to the right of the lens) will have the following properties:
| The image forms... | beyond 2f |
|---|---|
| The nature of the image is... | real |
| The orientation of the image is... | inverted |
| The size of the image is... | magnified |
Worked Example Draw a ray diagram to show how a converging lens can be used to form a diminished image of a real object.
Label the object, image and principal foci of the lens on your diagram.
Answer:
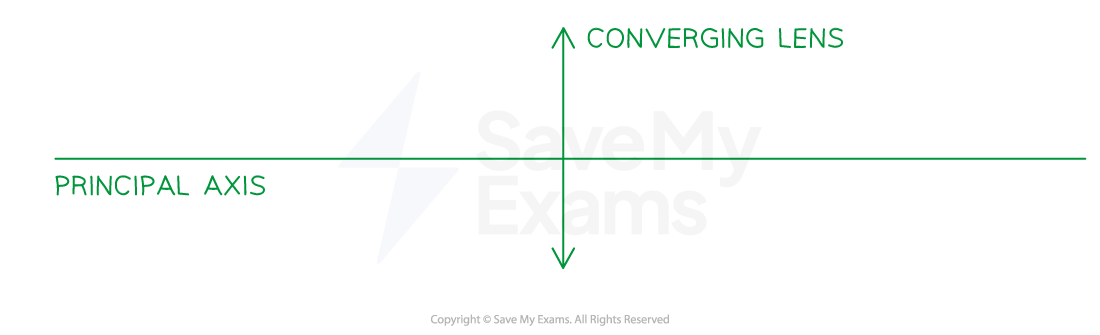
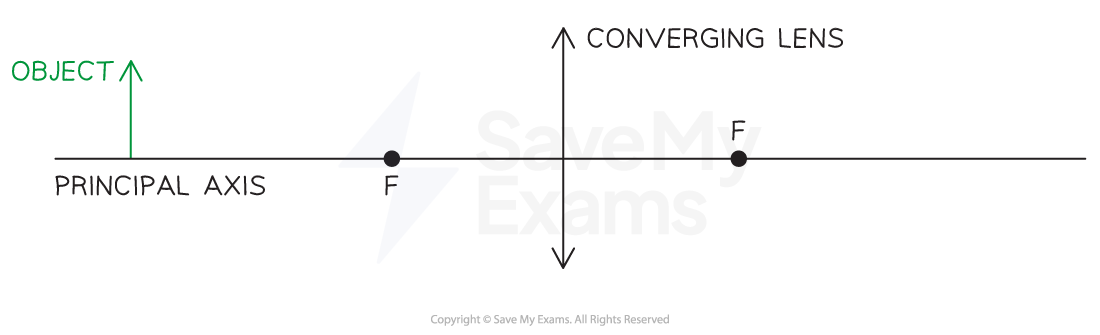
Step 1: Start by drawing and labelling a principal axis and the lens as a line or a very thin ellipse
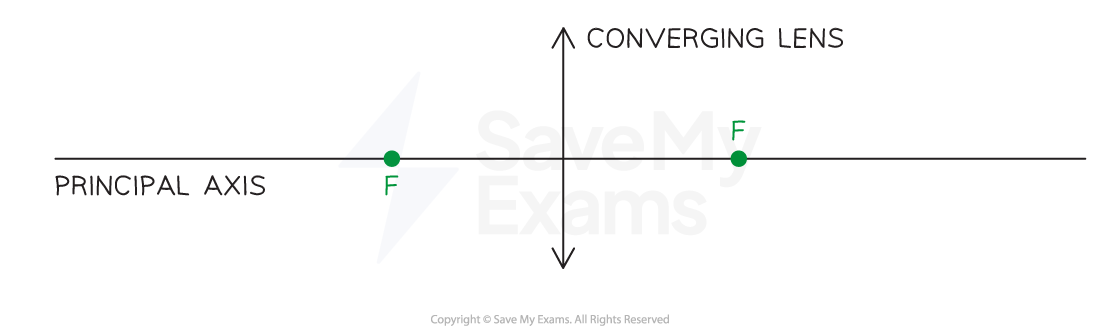
Step 2: Mark and label the focal points on each side of the lens
Step 3: Draw and label the object at a distance greater than the focal length on the left side of the lens
- Tip: For a diminished image, the object should be placed a distance of at least 2f away from the lens
Step 4: Draw a ray through the optical centre of the lens
Step 5: Draw a second ray from the object to the lens which is parallel to the principal axis
Step 6: Draw the continuation of the ray passing through the focal point on the right side of the lens
Step 7: Draw and label the image at the point where the rays meet
Step 8: Check your final image and make sure everything is included to gain the marks
For a three-mark question, examiners will be looking for:
- One ray drawn through the optical centre of the lens
- A second ray drawn which produces a diminished (smaller) image (which must pass through a labelled focal point)
- Both the object and the image must be drawn and labelled correctly
Was this revision note helpful?
Build on this topic